Building an Intel TDX Workstation
At the start of this year, I had the opportunity to setup what I would call a “server grade” PC, but in the traditional enthusiast form factor of a mid tower. The reason my friend and I wanted this PC was to do some development testing with Intel TDX, as we needed experience configuring Intel TDX from bare metal. It is also more cost effective to build our own than launch bare metal instances on the few cloud providers that offered them. Furthermore, my friend already had one for AMD SEV-SNP, so like, why not?
We had several requirements:
- The motherboard should not come from Asus, due to bad experiences with Asus customer support for the motherboard that was used in the AMD SEV-SNP workstation, and furthermore, I had another friend had experiences getting his ethernet port bricked by Asus’ official firmware.
- It should not come in a 1U rackmount form factor, because the fans would be small and extremely noisy, and we did not have a dedicated server room. This mostly meant that the only choice we had was to build in a tower case, as virtually no builders in this tiny red island were willing to customise a random server grade build for us, given that we had very specific requirements for a build that supports TDX.
- Try to source as many components locally as possible, so that we could get local warranty. This was also very tough, and unfortunately, many of the parts had to come from overseas.
- This is not quite a requirement, but none of us had ever tried using a U.2 or U.3 drive before, so we decided to get one to try instead of getting m.2 SSDs. I thought it was worth it in any case to invest in one due to the high TBW.
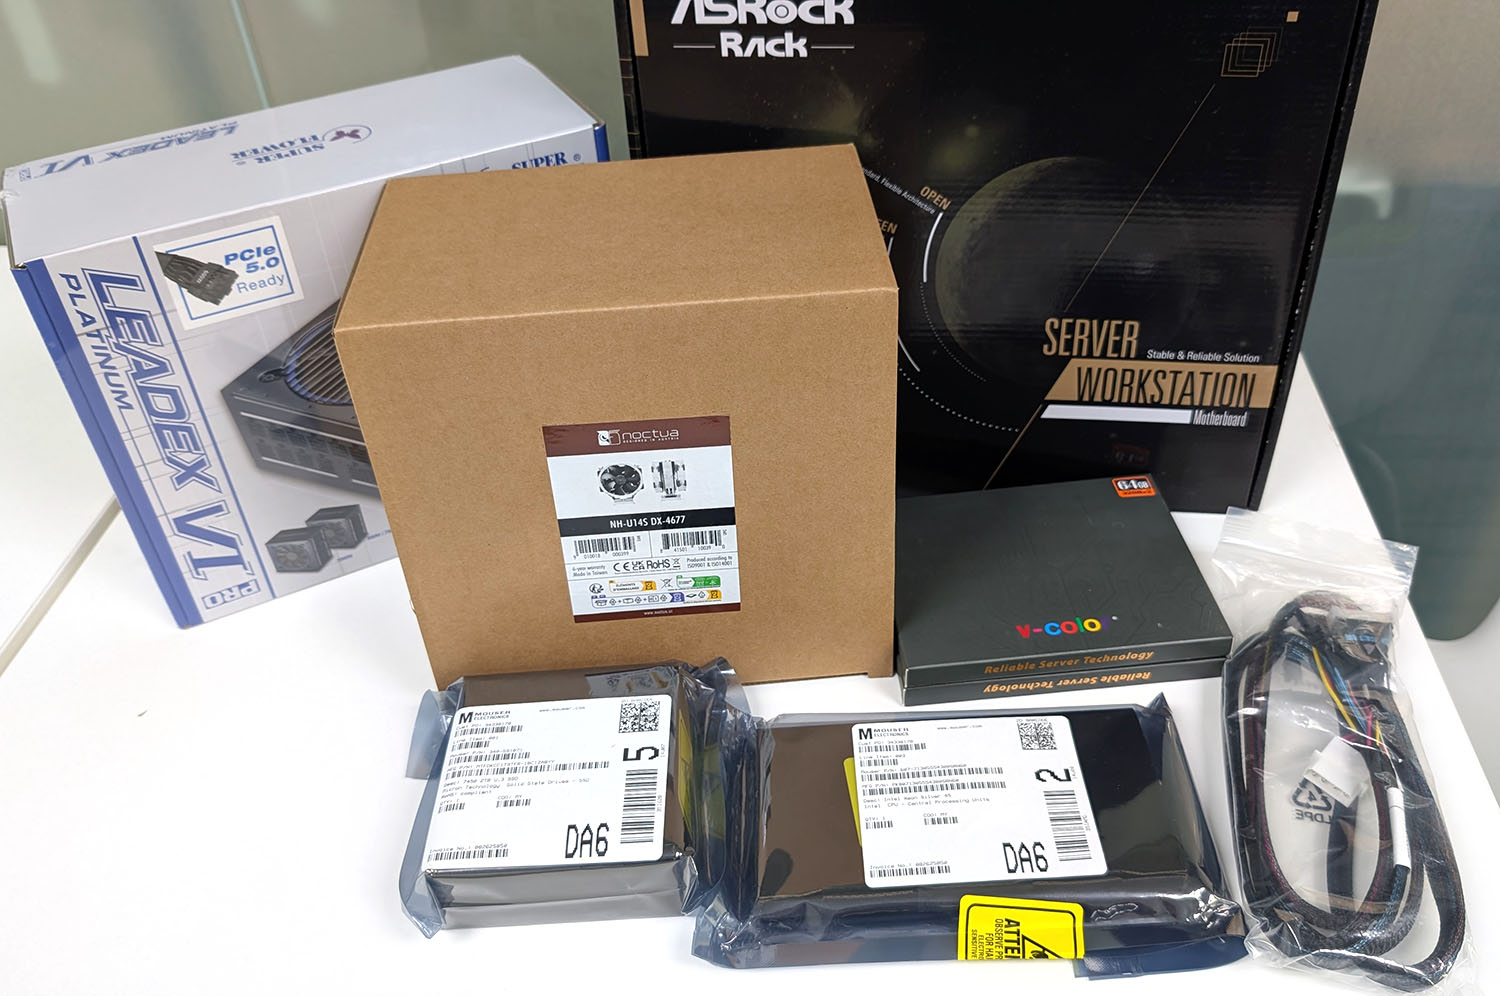
In the end, I settled for the following parts:
| Type | Item | Source |
|---|---|---|
| CPU | Intel Xeon Silver 4510 (tray) | Mouser |
| CPU fan | Noctua NH-U14S DX-4677 | Amazon |
| Motherboard | ASRock Rack SPC741D8UD-2T | Newegg |
| RAM | V-Color DDR5 64GB (32GBx2) 4800MHz CL40 4Gx4 1Rx4 ECC R-DIMM | Amazon |
| PSU | SUPERFLOWER LEADEX VI PRO 850W | Shopee, Local |
| Case | Montech AIR 903 MAX | Local |
| SSD | Micron 1.92TB U.3 (MTFDKCC1T9TFR-1BC1ZABYY) PCIe Gen 4 | Mouser |
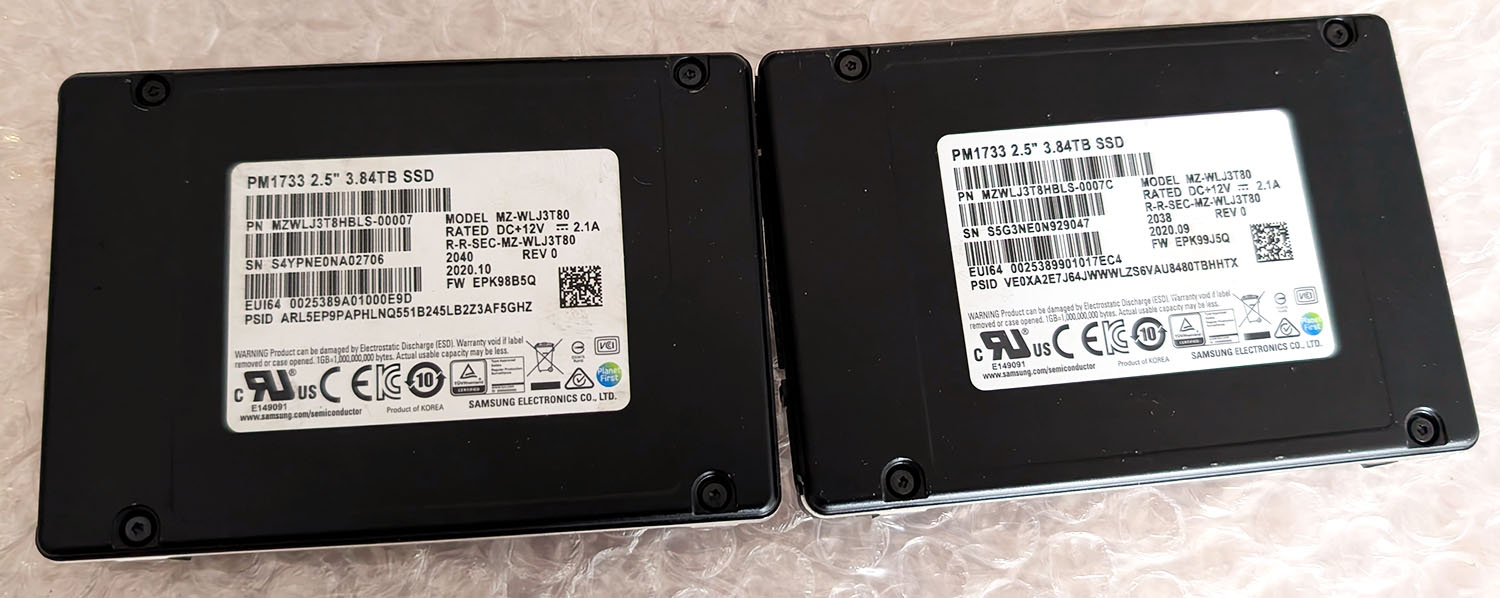
| SSD (used) | Samsung PM1733 3.84T U.2 PCIe Gen 4 (95% TBW remaining) | Taobao |
| Cables | MCIO to U.2 Cables (1 to 2) | Taobao |
| UPS | Prolink 2000VA UPS | Lazada, Local |
All in all, we spent around USD $4k on this pc, which I think is pretty decent.
While I have been building a few smaller form factor PCs for myself and my friends over the past few years, this was the first time I was attempting a server build and I was worried about getting things wrong. Some things I wasn’t originally familiar with:
-
It was honestly a challenge deciding on which deep-mATX or EATX boards to get that would actually fit into a standard tower case. And this was despite only looking at the boards that Gigabye and ASRock Rack had. Not to mention, I’ve literally never heard of any consumer grade motherboards that came in a deep-mATX form factor. There’s not much reviews on most of these boards either. The last thing I wanted was a case where the motherboard didn’t fit inside, and I’m not sure I want to do some frankenstein things to the case to make it fit.
-
Adding on to the previous point, I also tried dumping BIOs options for some of those motherboard firmwares I found online, because I wanted to see whether it already had options to enable Intel SGX and Intel TDX, as well as PCIe bifurcation. This research lead to nothing in the end because the options were dependent on certain properties which weren’t immediately obvious. In the end, when I built the PC, I had to contact technical support for a BIOS that supports Intel TDX, and because I don’t yet own a passive PCIe bifurcation card, I still do not truly know if my motherboard supports PCIe bifurcation without the need for cards with switches.
-
The LGA4677 socket. I had to be super careful even when reading up on the motherboards, because there were some motherboards with an LGA4677 socket that did not support Intel Scalable CPUS, only the Xeon W series.
-
I read a lot about server RAMs before purchasing, but I was hoping that I wasn’t making any mistake with the RDIMMs I bought, which, luckily, turned out to work perfectly fine.
-
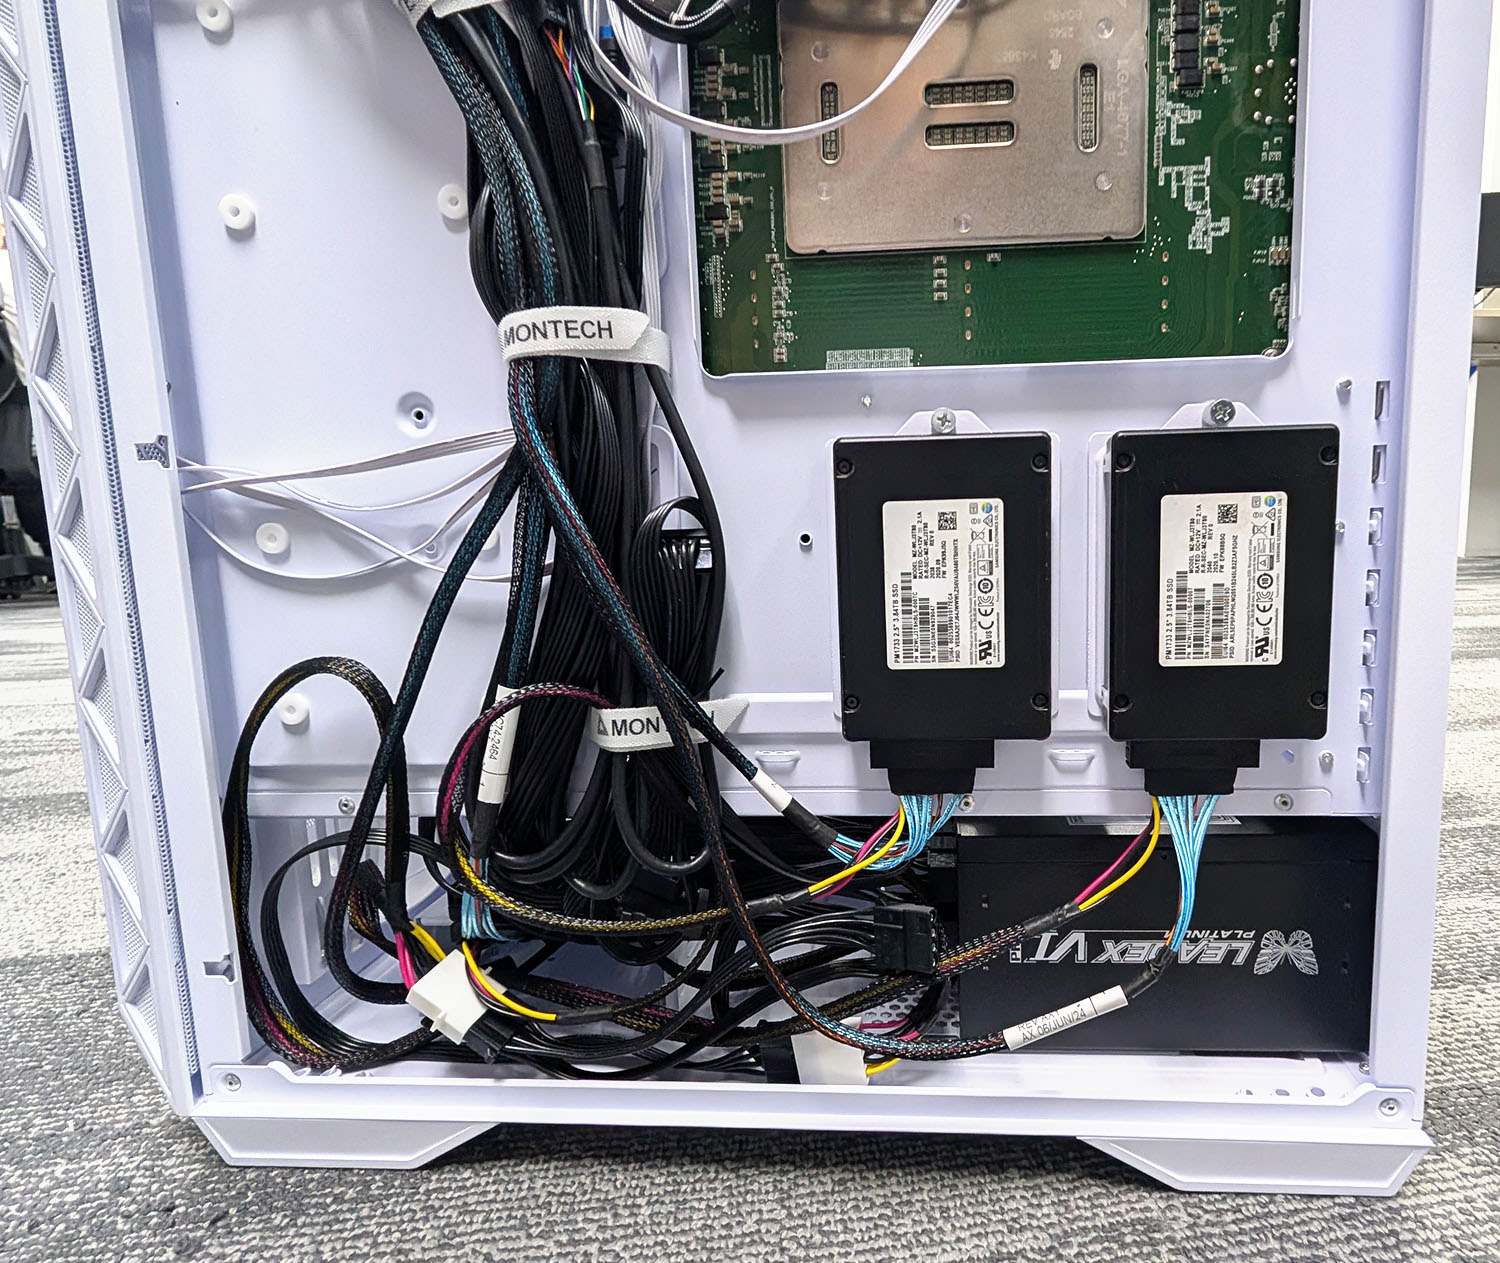
It was the first time working with MCIO ports on the motherboard and I was just so confused by the pictures of the MCIO cables on Taobao. It honestly didn’t help that everything was in Chinese and I was struggling to understand the Google-translated English. But it turns out that you just needed to plug the MCIO end of the cable into the motherboard and the molex end to one of your molex cables from the PSU, and the last 2 parts of the cables, which were SFF-8639 connectors, allow you to connect 2 U.2 or U.3 drives.
Some takeaways from this experience:
-
Initially, I separately ordered an E1B carrier frame for my CPU since it was coming in a tray (ie, it would not come with anything else, like a CPU fan and what not). I realised that I actually didn’t need to buy a separate carrier frame because my motherboard came with an E1A and E1B carrier frame. So, I ended up having a spare frame.
-
I wanted to have a full front-to-back airflow for the case, but I didn’t expect the Noctua fan I bought to have a top-down airflow design. It was a bummer that I didn’t question the product pictures more closely, but what’s done is done, and the PC wasn’t over-heating, so I’m not complaining.
-
I ended up not being able to use the case’s front USB panel since the motherboard didn’t have a USB3 header, which is a bummer.
-
I thought that an 850W PSU would be enough, but then Nvidia dropped the GTX 5090 right after I pieced together the PC, and it turned out to be insufficient if we wanted to place a GTX 5090 into the PC. This meant that we would not be able to experiment with the GPU even if we chose to get it. In any case, the price of the GPU is pretty ridiculous where I am, so there wasn’t any point buying it on launch.
-
Initially, I was pretty worried about whether I would be able to get my firmware from ASRock Rack techical support, because the firmware available on their website didn’t have support for Intel TDX. And sometimes, your experience with technical support depends largely on your luck. I was, however, pretty lucky to get stellar experience with their technical support. They gave me a beta version of the motherboard firmware that supported Intel TDX and we managed to run a Confidential VM in the PC after setting up all the required components, with a working remote attestation process as well.
-
Before I contacted ASRock technical support, I didn’t know that I had to fill up all RAM slots in order to enable Intel SGX, which is needed to enable Intel TDX. I had to order more RAM halfway through the month while overseas, and it delayed our dev process. So in total, I ended up having 8 sticks of 32GB ram, resulting in a total of 256gb ram. While excessive, it turned out to be a good thing in the end as we ended up running an Ethereum fullnode on it to demostrate the feasibility of running production software in Confidential VM. It’s been up for 2 months now with no issues, handling an average of 200 requests per second.
-
We didn’t initially intend to run any fullnodes on the PC itself, and so I was wholly unprepared to have to add more disks to the machine itself. In hindsight, the Montech Air case, while being a great size that fitted everything, was a bad choice for a case due to the lack of disk slots. Now we have 3 disks in the machine and can only afford to slot in one more disk. I haven’t thought about how I’m going to add more U.2 SSDs to the case - I might need to 3D print a cage or somehow drill holes somewhere to screw them on. So much for not trying to do frankenstein things to the case!
-
Used U.2 disks have a really great price on taobao, and many of them have at least 80%-95+% of its TBW left, which is still honestly, pretty good, given that enterprise disks have far higher write capacities than consumer SSDs. I could use these disks for years and I’d probably never use up all its write lifespan.
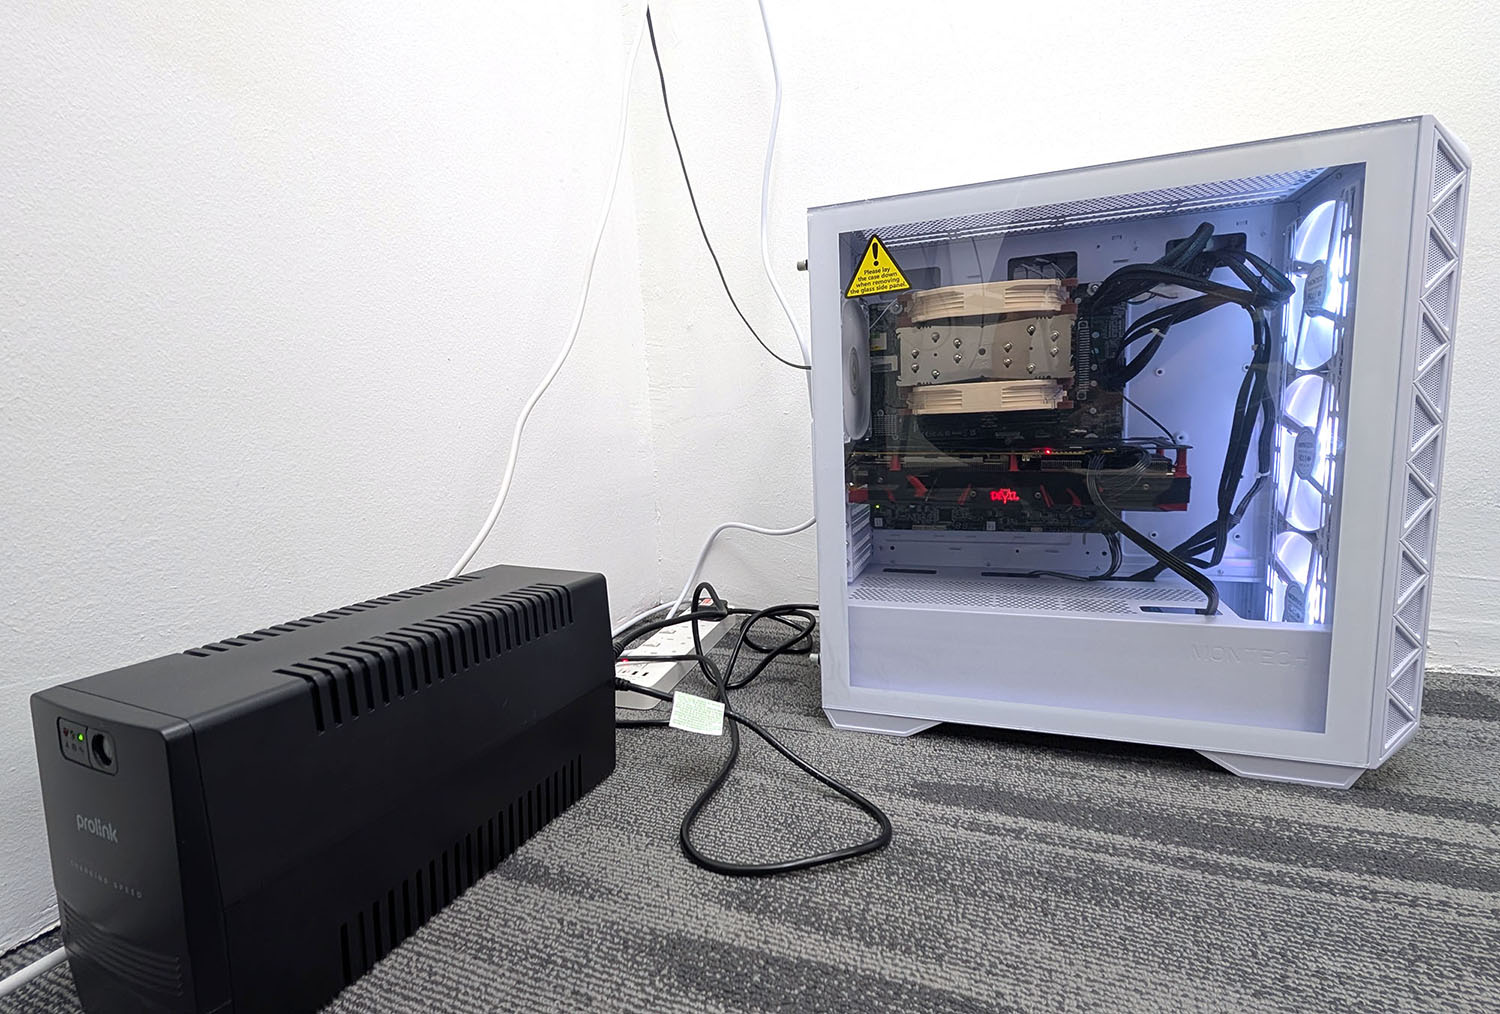
Anyway, enough of words. Here are some pictures of the workstation (please ignore my horrible cable management):